
Create your page
Create your page step by step
The four steps of the wizard, and what to write in each one.
The wizard has four steps, and you can move back and forth with the Back and Next buttons. Everything you type is saved automatically: if you close the tab, you'll be offered to pick up where you left off.
Step 1 · Title
Here you set the big name on your page, your trade, and your country. Three fields, all of them editable later.
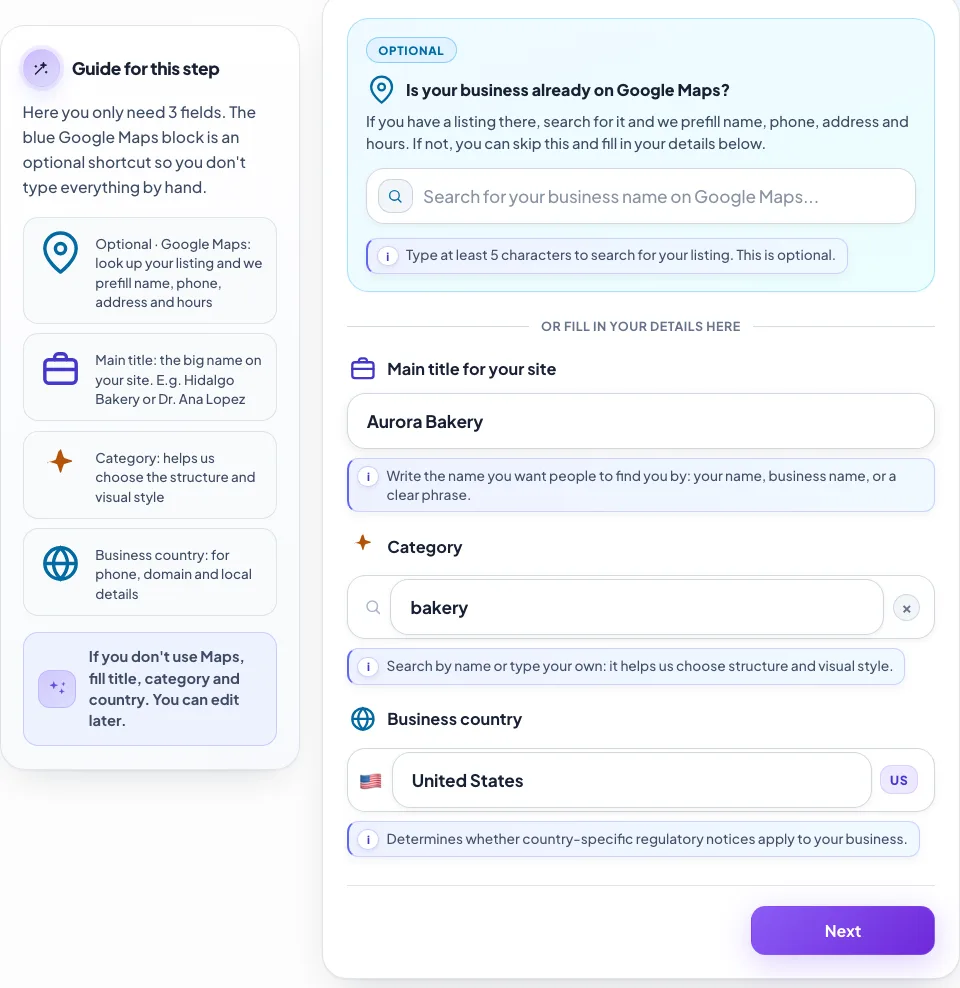
- 1Optional shortcut: find your Google Maps listing and we'll fill in name, phone, address and hours for you.
- 2Main title: the big name on your page. E.g. “Aurora Bakery” or “Dr. Ana Lopez”.
- 3Trade or category: it drives the structure and the visual style the AI will propose.
- 4Business country: sets the phone format and local details.
Required: the title (at least 3 characters) and the category. If you choose "Other", describe in your own words what your business does.
Step 2 · Story
This is the step that shapes your page the most. The more you tell the AI, the better it writes your copy and the better it decides which sections you need.
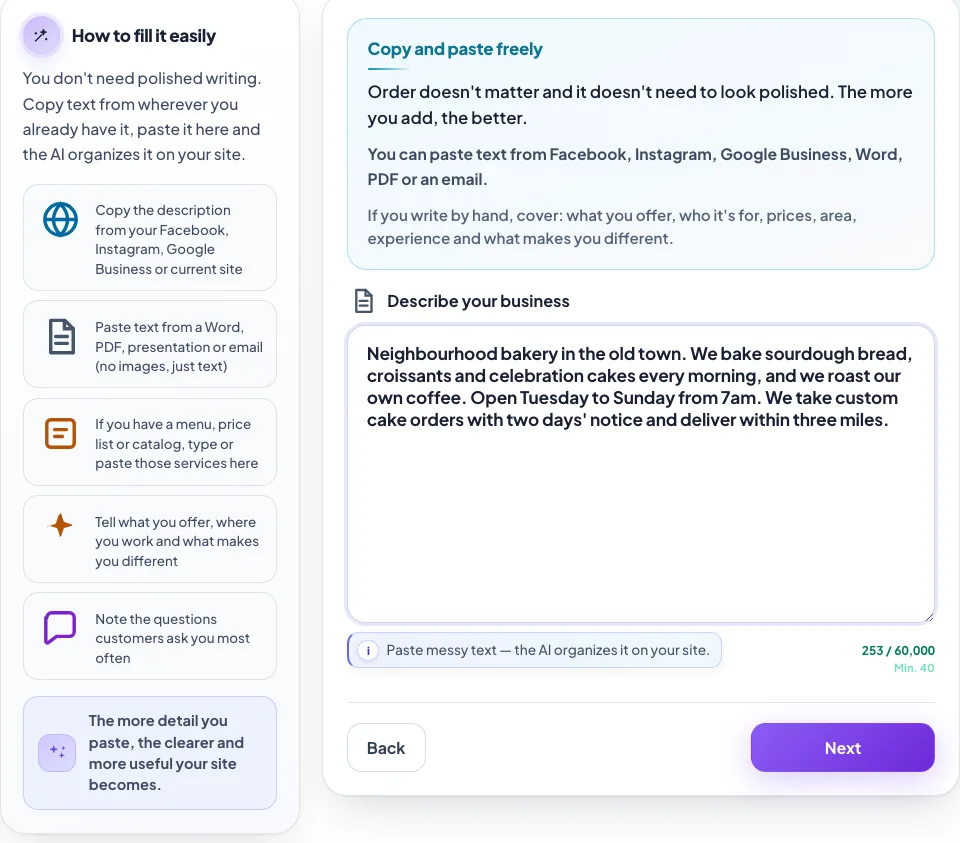
- 1Paste everything you have here. Order and wording don't matter — the AI organises it.
- 2Counter: you need at least 40 characters, but there's room for far more.
What you can paste in, unsorted:
- The description from your Facebook, Instagram, Google Business or current website.
- Text from a Word file, a PDF, a deck or an email (text only).
- Your menu, your price list or your service catalogue.
- The area you cover and what sets you apart.
- The questions customers ask you most often.
Step 3 · Contact
Everything someone needs to message you, call you or find your premises. These details become the buttons on your page.
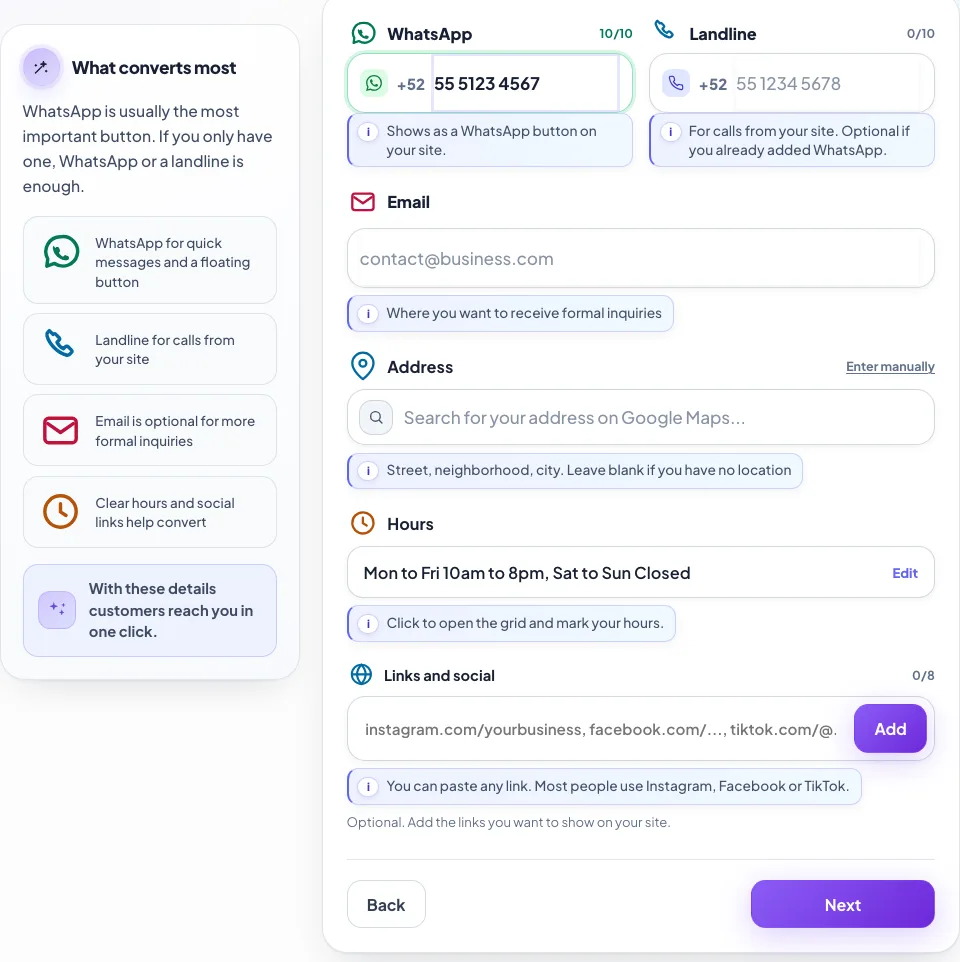
- 1WhatsApp: becomes the floating button on your page. Usually the one that brings the most customers.
- 2Landline: lets visitors call you with one tap from a phone.
- 3Address: leave it empty if you don't serve customers at a location.
- 4Opening hours: optional, but they help people get in touch. Your social links go below.
Required: at least one of the two, WhatsApp or phone. Everything else is optional.
Step 4 · Materials
Upload your photos. The AI looks at them, understands what's in each one, and places them where they make sense on the page.
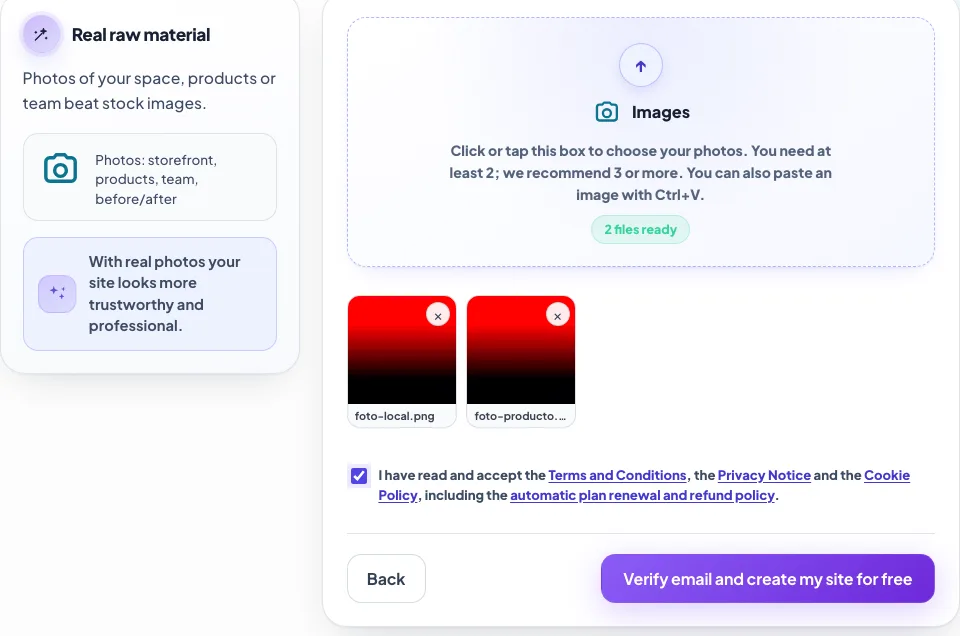
- 1Drag your photos here, or click to browse. You can also paste them with Ctrl+V.
- 2Accept the terms to continue.
- 3Final button: creates your page. If you're not signed in yet, we verify your email here.
Required: at least 2 photos; 3 or more recommended. Accepted formats: JPG, PNG, WEBP and GIF.
The photos that work best:
- The front or the inside of your premises.
- Your products or finished work, close up and well lit.
- You or your team at work.
- Before and after, if your service shows in the result.
What happens when you hit the button
You'll see a progress screen while the AI analyses your business and prepares your designs. It takes a few minutes and tells you where it is.